All pictures are thumbnails. Click on them for a larger version.

Interior shiny bits!
The Noble interior is a comfortable place to be (after you fix the heat problem!), but it's also quite Spartan. I'm not looking for Bentley, but I did want to make some small improvements. Dash air vents and a shifter trim ring from the Audi TT fit with only minor modification and provide a dash of bling. The aluminum pedals also provide some relief from all the blackness as well as an aid to heel/tow downshifts. I had to replace the rubber bellows around the shifter with an Alcantara boot because I could not get into reverse. This made backing out of the garage difficult.
Removing factory vents
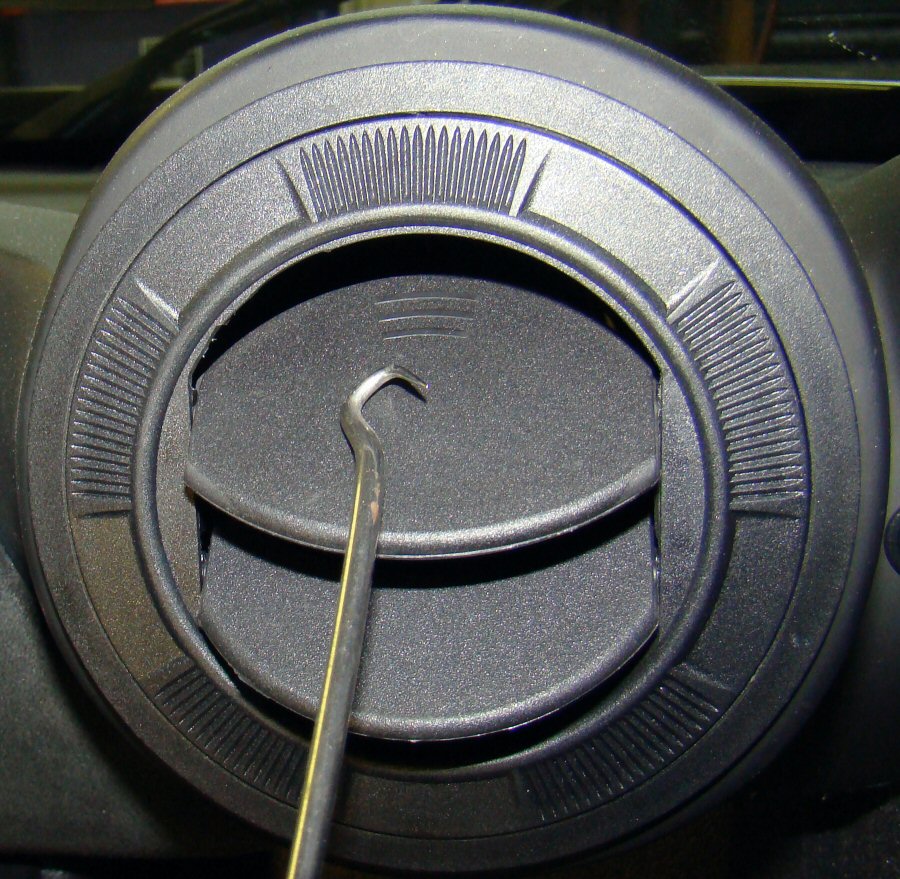
As is so often the case with cars, doing something the right way is endlessly easier than the wrong way, but the right way requires knowing the secret trick. In this case, it's using a dental hook to release a tab hidden inside the factory dash air vents.
Secret release tab
This pic could be better, but between this pic and the next one, you should see what I'm doing with the dental pick. When you release the tab with the pick, the vent pulls right out.

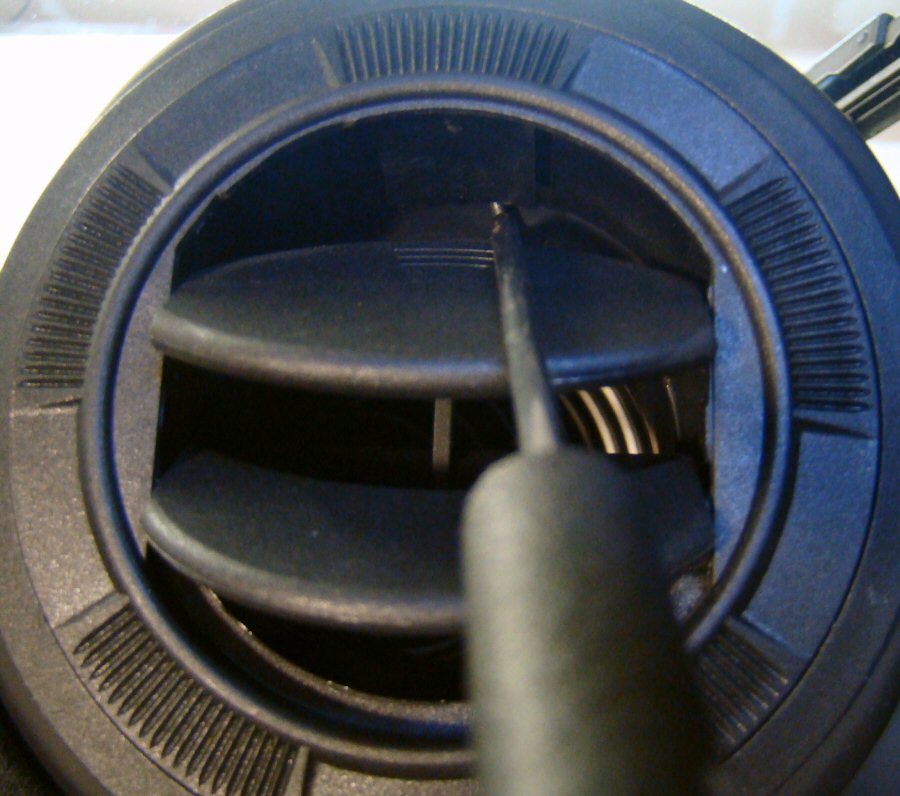
Secret release tab detail
This is what you're trying to do with the pick. Push the hook towards the center of the vent and the plastic wedge part will disengage.

Power windows in a race car
Yeah, I know. Power windows in a race car? I much prefer driving with the windows down. The Noble is a small car, but it's not really narrow. That, the deep bucket seats, and the center tunnel all add up to me not being able to wind the passenger side window down while driving. Solution? Power windows!
Must. Hide. Wires.
I've seen my share of automotive hack jobs, and this was not going to be one of them. It took some patience and some persistence, but I got all the window wires through the factory rubber wire guides. If you're wondering how, I arranged the wires such that the ends were all offset from each other, then taped them together in a very tight bundle. The electrical tape formed a point at the leading edge of the bundle. The whole thing was pointy enough and stiff enough to push through the rubber wire guide.

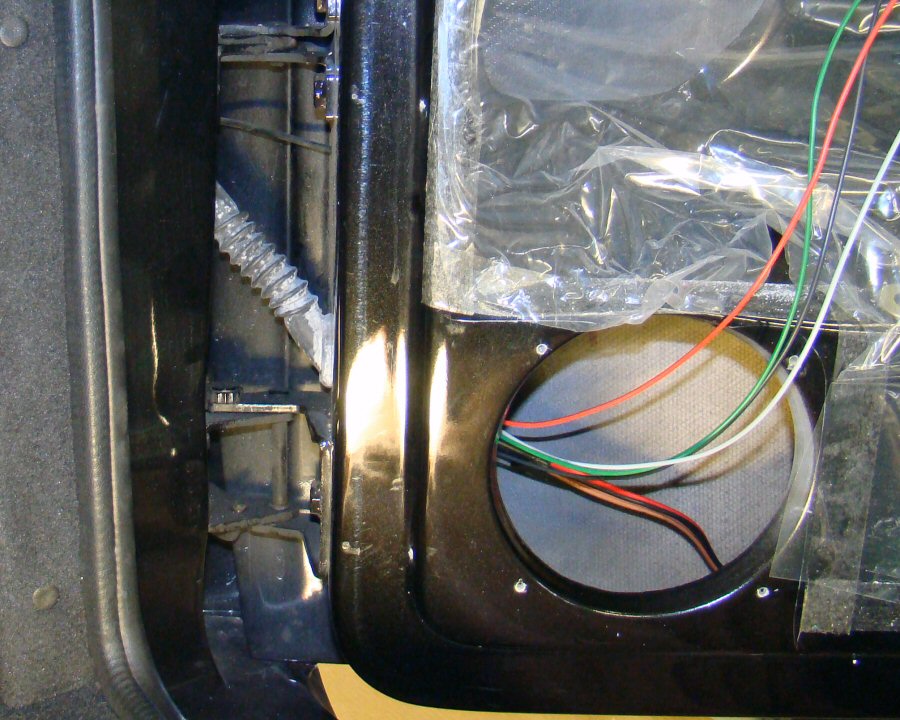
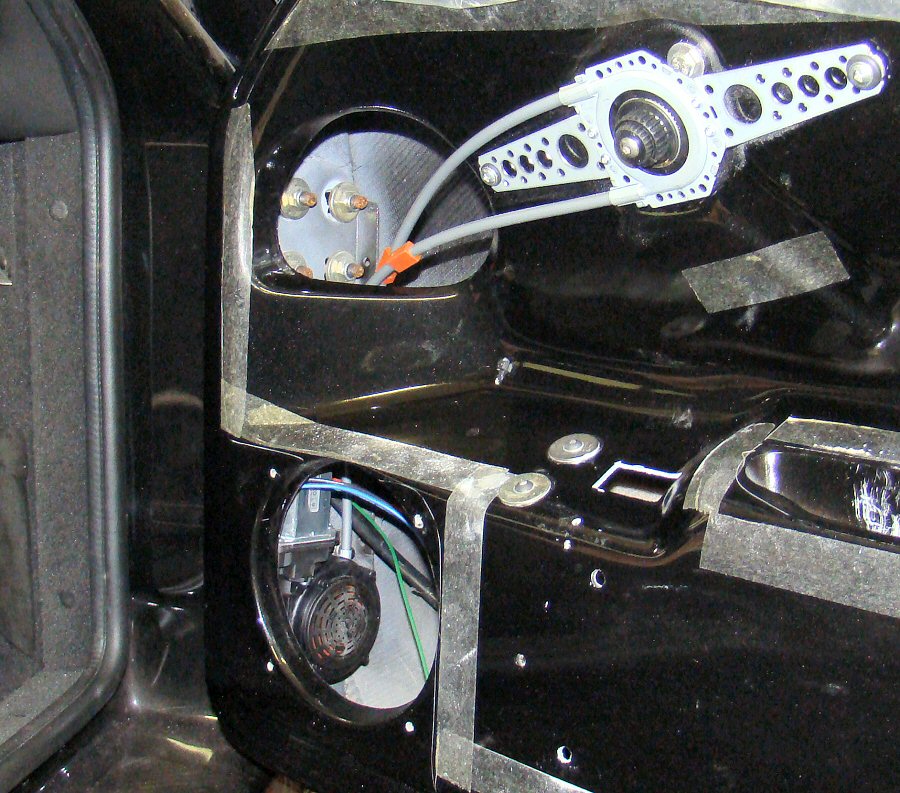
Motor close-up
The Spal power window kit included flexible motor mounting options. The only new holes I drilled in the doors are on the bottom. This means no new ways for water to get in! You are looking through a speaker hole that was created by Noble, not me.
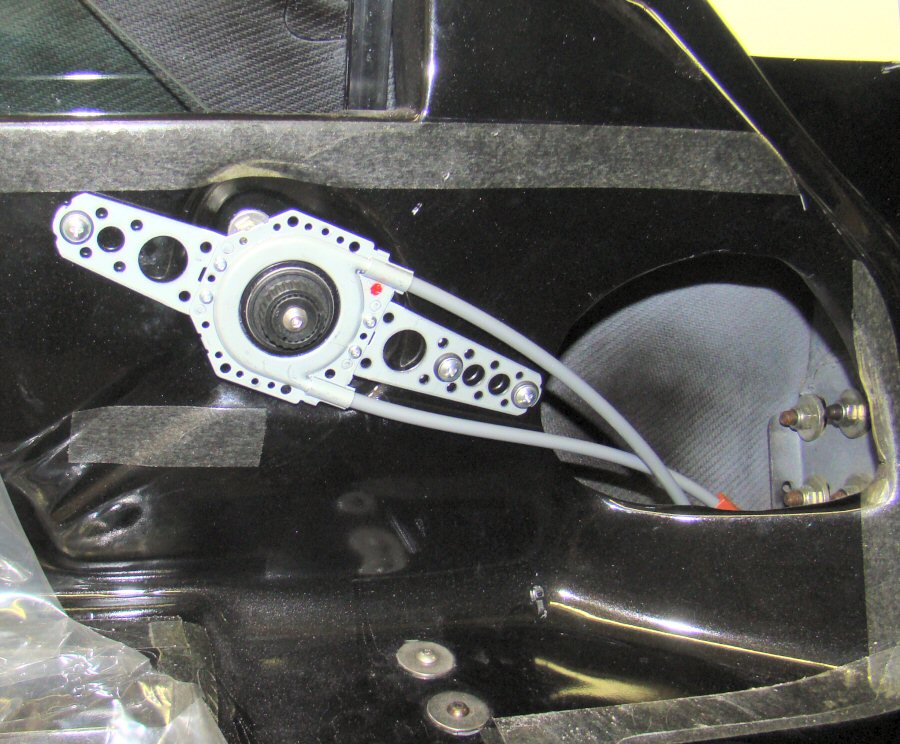
Winder upper close-up
Here is the mechanism that operates the existing window winder. This bracket attaches in place of the factory winder arm and is connected to the motor by the two cables seen here. The entire setup is very solid. No rattles anywhere.
Passenger side
Here you see almost the entire passenger side assembly. Be sure to click on this thumbnail to see a larger format picture. I'm 100% satisfied with the Spal kit. The windows move quickly and the whole system looks like factory equipment.
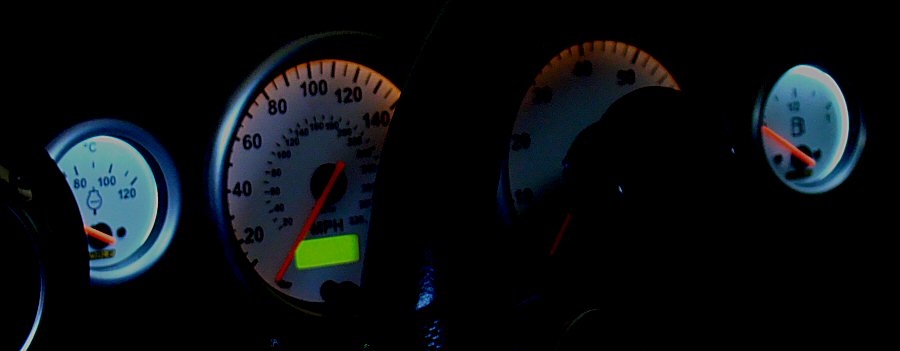
LED gauge lights
Factory gauge illumination is, umm, suboptimal. Useless is probably a more accurate term. But this is easily rectified with LED replacement lamps. Here you see an LED in the water tamp gauge and a factory incandescent in the speedometer.
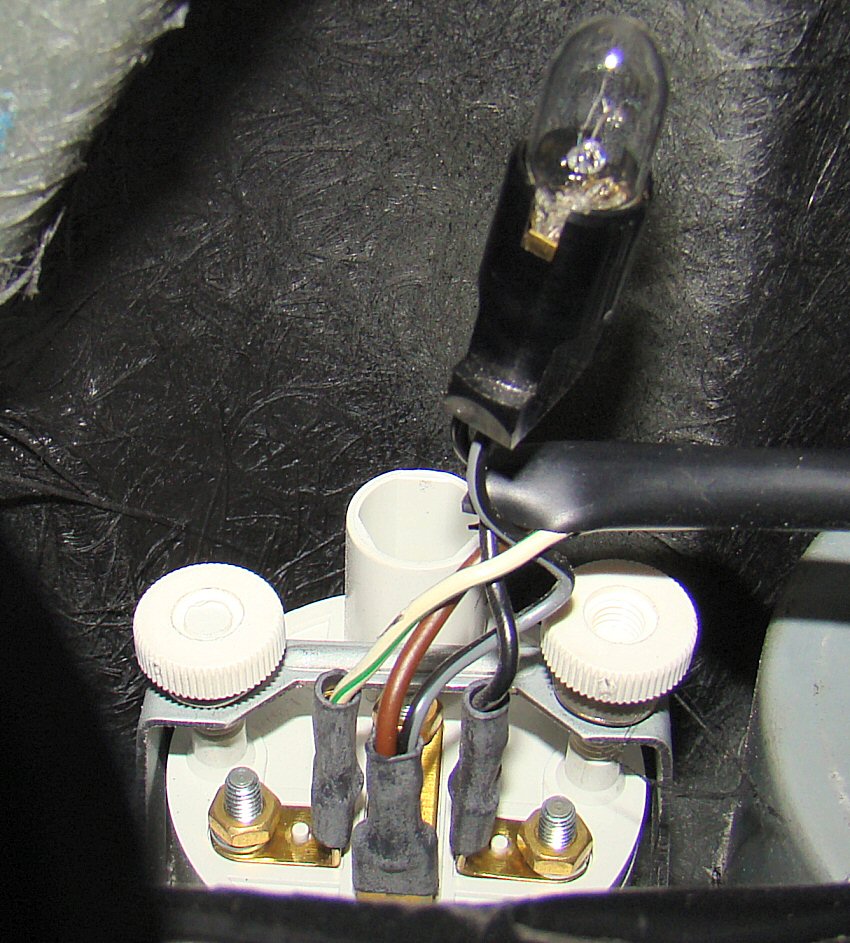
Gauge light access
The LED swap is extremely easy, at least for those of us who fit in the car with our heads in the foot well and feet on the headrest. This is a pic of the back of one of the gauges as seen from the footwell. The lamp socket just pops straight out.
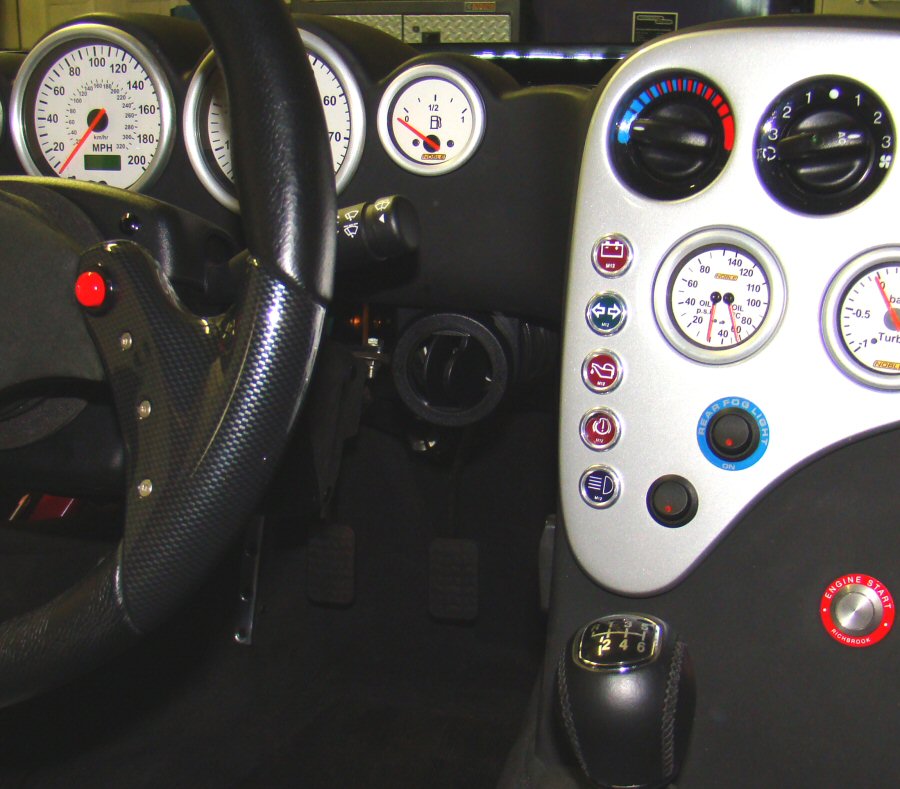
New HVAC vent location
The factory installs air vents only on the ends of the dashboard. Nothing in the middle. What this means is that the driver's left hand (in the US) either freezes or roasts. My ultimate goal is to add proper vents to the silver panel seen in this pic. In the meantime, in order to get a more uniform interior temperature, I added a vent above the driver's right knee. It doesn't look finished if you're staring at it, but it does pretty much disappear unless you look for it.

New HVAC vent plumbing
This is a pic to show the tee I bought to feed air to my new vent. I tapped into the hose feeding the existing dash vent, which means I've more or less equalized the flow out of the two vents aimed at the driver.

